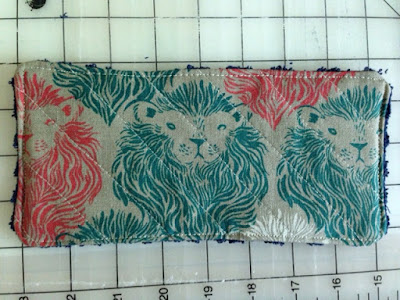
I just got an Ergobaby carrier to do some baby wearing with Stanley, and the first thing he does once he is settled into it is start chewing and drooling all over the straps. This will not do. I can't tolerate crispy dried drool, but I also don't want to have to wash the whole dang thing after every few uses. I did a little googling, and sure enough, Ergobaby sells removable teething pads that you can snap over the straps. But seeing as my motto is "Homemade anything is better than store bought everything", and I have an abundance of fabric around here, I set to work making my own. And I took a few pictures along the way in case you want to make some, too!
First gather your materials. I used a wash cloth, some scraps of quilt batting, and some canvas (Cotton and Steel lions), plus four snaps.
I used my 9.5" quilting square to cut the washcloth, batting, and canvas into two sets of 9 inch x 4.75 inch pieces. I fussy cut the lions so that they would be centred on the strap, so depending on what kind of fabric pattern you select, you may want to be mindful of that.
 |
| I adore these lions |
Next, I layered the canvas and the quilt batting and did some simple straight line quilting on the diagonal.
Then I layered the washcloth over the canvas, right sides together, and sewed around the perimeter with a quarter inch(ish) seam, leaving about a 2" gap to turn it right side out. Backstitch at the start and stop.
Then turn right side out, making sure the corners are pushed out really well. Press, ensuring to turn under the seam allowances in the gap.
Top stitch around the whole perimeter about 1/8inch from the edge. For quilting and top stitching I use a longer stitch length of 4.5.
Lastly, use your snap tool to attach the snaps in the corners. I placed the teething pads on the straps and lined them up to make sure I was putting them in the right spot. If you don't have a snap tool, you could use sew on snaps, or Velcro instead.
The nice thing about these is that they are reversible as well!
 |
| Lions or terry cloth.... babies like choices, moms like two sides to get gross before washing |
This is a great solution to avoid having to wash your whole carrier frequently. Just unsnap the teething pads and throw in the wash!
 |
| The lions are Stanley approved |


